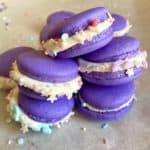
Vegan French Macaron Cookies
This is a delicious classic French macaron recipe that uses aquafaba or liquid from chickpeas instead of egg whites.
Servings: 32 sandwich cookies
Ingredients
- 100 grams aquafaba or 2/3 cup - drain from canned or jarred chickpeas or garbanzo beans
- 90 grams sugar or 1/2 cup sugar
- 140 grams fine ground almond flour or just under 1 and 1/2 cups
- 130 grams powdered sugar or just over 1 and 1/8th of a cups
- 5 ml or 1 teaspoon vanilla extract
- Dab of gel food coloring - only use gel food coloring not liquid and apply for your desired color, keep in mind that colors will mute slightly when baked.
Instructions
- Drain aquafaba from chickpea can or jar and weigh out 100 grams or 2/3rd's of a cup.
- Add to a clean electric mixer bowl with a whisk attachment in place or a bowl that you can use an electric mixer or whisk with.
- Measure out your sugar and vanilla in separate containers and set aside.
- In another bowl, sieve and weigh out your almond flour and powdered sugar, don't forget to set your scale so you don't weigh the bowl or sieve. You don't want any clumps or big pieces of almonds or powdered sugar because it will effect the way your cookies look. They will taste the same but they will not look as pretty. If you want flawless macarons you can pour your ingredients through a sieve or fine mess strainer a few times to get the smoothest possible mixture.
- Stir almond flour and powdered sugar together and set aside.
- Begin mixing your aquafaba.
- When it starts to get frothy then slowly add in your sugar to the aquafaba while the mixer is whisking,
- Whip aquafaba to soft peaks, that is when you stop the mixer and remove the whisk attachment and dip the end of it in the aquafaba mixture then flip the whisk end up in the air to see how the mixture holds up, for soft peaks, it will stick up but then immediately slump to the side and doesn't hold up perfectly straight.
- At this point add your vanilla and gel food coloring and continue whipping until you get stiff peaks. Stiff peaks will stand up perfectly straight when the whisk is dipped into mixture and flipped upside down. The aquafaba mixture should peak and stay standing straight up in the air.
- Add 1/3 of the almond flour and powdered sugar mixture into the aquafaba meringue mixture and using a rubber spatula, fold the mixture in a circular motion, going from the top edge of the bowl, then down the side of the bowl and down to the bottom and towards yourself in a circle, rotate the bowl around as you are turning the batter so you get all angles. This method of stirring is called macaronage and it helps keep the air that has been whipped into the aquafaba in the batter so these cookies get their signature lift and look. Stir like this until almond flour mixture is incorporated then add another 1/3 of the almond flour mixture to the batter and stir the same way then finally add the remaining amount of mixture to the batter.
- Stir the final amount of almond flour mixture into the batter and stir until mixture gets a little bit of a shiny sheen to it and the batter will slowly slip off the spatula and fall back into the batter. Some say you should be able to make a figure eight in the batter and have it melt back into it, I usually call it good when the batter slips off the spatula and goes gently back into the batter.
- Prepare baking pans with parchment paper and use a printed out circle guide under the parchment paper so you can see how big to make each cookie.
- Take a piping bag and place a large round piping tip in the bottom, doesn't matter size, it is just to help us get round cookies. Move piping tip to the bottom of the piping bag and snip the end of the bag off so the piping tip goes to the opening. You can also use a gallon sized zip lock bag and snip the corner without the piping tip but the cookies won't be quite as round.
- Place bag into a large glass or cylinder container and fold the outside edged of the bag over the sides so the center of the bag is open then fill the piping bag or ziplock bag with the batter.
- Twist the top of the bag and hold with one hand so the batter doesn't pour out the top of the bag. apply pressure to the bag and pipe at a 90 degree angle then pull up and slightly twist to make a clean break in your macaron piping.
- Once all the cookies are piped, bang pans several times against a study surface so all the air bubbles come to the top of the cookies.
- If you don't want any bumps or air bubbles, use a clean needle to pierce each air bubble.
- Let cookies sit on the counter top to dry out for 40 minutes to 1 and 1/2 hours or until the tops feel dry and can be touched with your finger and they don't budge at all. They will feel dry.
- Preheat oven to 300 F.
- Bake for 11-12 minutes or until "feet" (the little rim around the bottom of the cookie) forms and the cookies look cooked. It can be a little of a guessing game, if cookies are still gooey underneath after baking and resting on the pan then return to oven for a minute or two or if cookies look too baked, you can brush them with a little milk, syrup or any liquid to soften them up before adding filling or even just adding a filling will usually soften them up too. So don't despair if they seem over baked!
- Let cookies rest on the parchment paper for 10 minutes before removing them or if you don't let them rest you risk them breaking apart or having the bottom stick to the parchment and the tops lift off.
- Fill cookies with caramel (I have a vegan caramel recipe HERE), chocolate ganache, frosting of choice, fruit curd, jam or homemade marshmallow (recipe coming soon HERE).
- Store these in the refrigerator and they are best between days 1-2 and I honestly love them fresh too, though most who make macarons professionally would slap my hand if they heard me say that, I say eat a few fresh, then a few more on day 1 then a few more on day 2 and so on until they are all gone that way you can enjoy all the stages of the macaron. They also freeze well and will store for up to 6 months in a sealed/air tight bag.