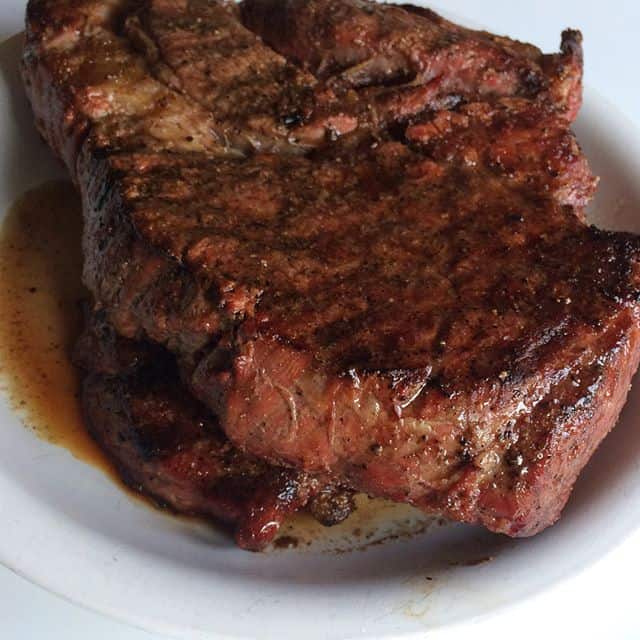
Think you have to go out to a restaurant to get an amazing steak dinner? If you answered yes, I am going to try and convince you otherwise! I think it would surprise a lot of people to know that making a fancy and delicious steak dinner at home is actually fast, easy and delicious than one would think!
Here are the basics you need to know:
What kind of steak should I buy?
This can be almost overwhelming when you enter a grocery store or butchers shop! You want a great steak but don’t want to spend a ton of money on a steak that you are afraid you might burn or mess up somehow! I get it, it’s scary and an expensive item to experiment with. However, if you follow a few guidelines you will not mess anything up and have a yummy dinner!
What I look for when picking a steak.
- Where should I get my meat? Butcher shops and grocery meat departments. Grocery store meat departments can have amazing quality steaks so don’t discount them when considering a cut of meat. Some of the best steaks I have cooked have come from Walmart or a local grocery store. Butchers shops are also a great option, read reviews online to find peoples favorites.
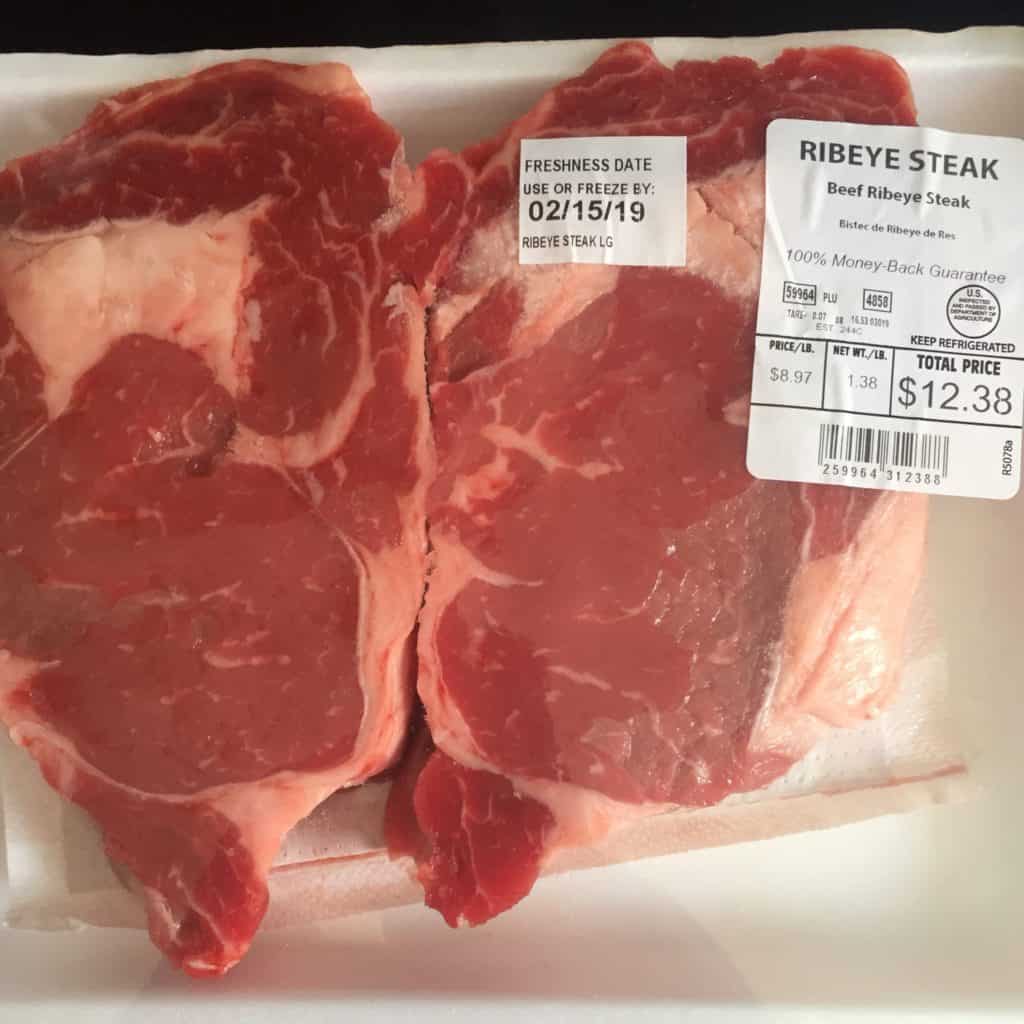
- Ask a pro but use your own judgment. Ask the butcher which steak he would recommend. Feel it out, if he is telling you to go for the $50 T-bone don’t feel pressured to buy it. Ask him what his 2nd and 3rd choices are. You can pick a cheaper cut and still have an amazing steak. All of the steaks shown in this post have been around $5-$6 per steak.
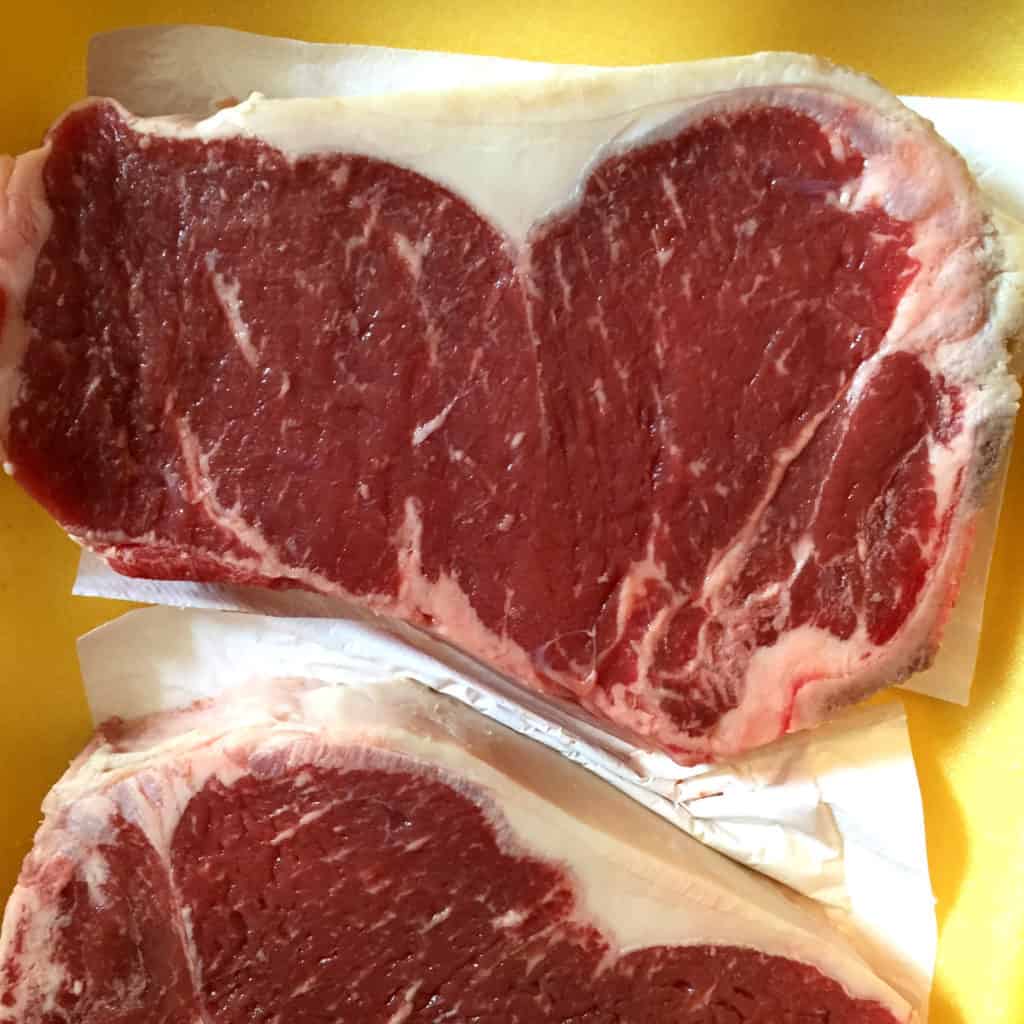
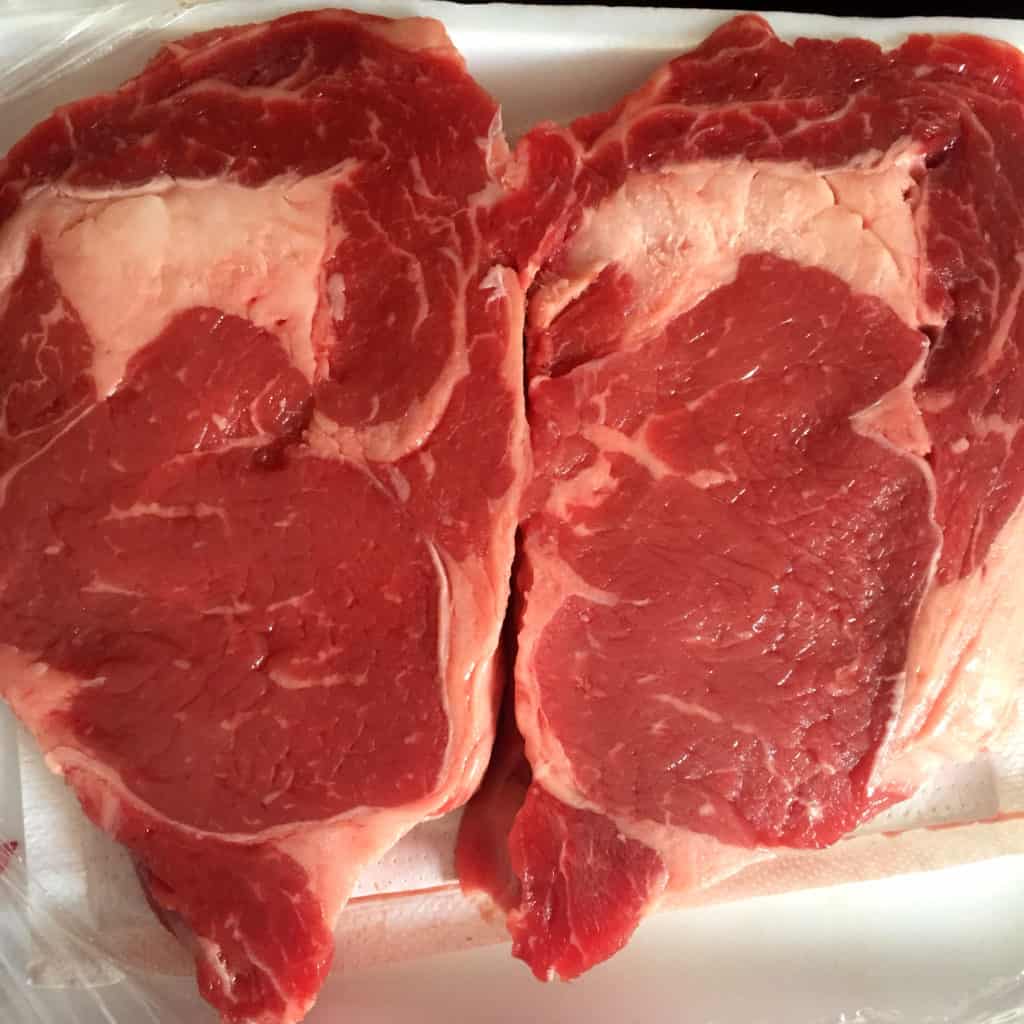
- Look for marbling. Marbling is the layers of fat that are swirled into the meat. I am not necessarily talking about a big fat cap on the steaks sides, but the fat that is mixed into the meat and looks like thin white thread woven in. This fat is going to melt into the meat when cooked which makes the meat more tender, juicier and more flavorful.
- Shop deals. Look for the meat that is on sale, I often choose a less popular cut of meat if it is on sale! The cooking technique I will show you will help you cook any cut of meat and have it taste great! So don’t stress about the cut.
- What are the best cuts of meat? Here are the common cuts of steak that are best for searing and cooking quickly: New York strip or strip steak, T-bone, Petite or Top sirloin, Filet Mignon, Rib Eye, Porterhouse.
- Getting technical about each cut. If you want to know the pro’s and con’s of each cut, including which ones will grill better and which ones are the tenderest, check out Steak Universities straight forward guide HERE.
What is the best way to cook a steak?
There are many ways to cook a steak that will have it turn out delicious but I would argue that cooking a steak in a cast iron pan is the best way to get a great sear and juicy interior on a steak. This is because the cast iron pan will hold the heat evenly and gets really hot, which means it can provide the perfect sear on your steak.
What do you need to season a steak with?
There are many steak seasoning options but I believe all you really need are two ingredients and those are salt and pepper. My method of cooking steak also has an optional addition of rosemary and garlic but they are used in a subtle way and not directly on the steak.
How can I tell and feel the done-ness of a steak?
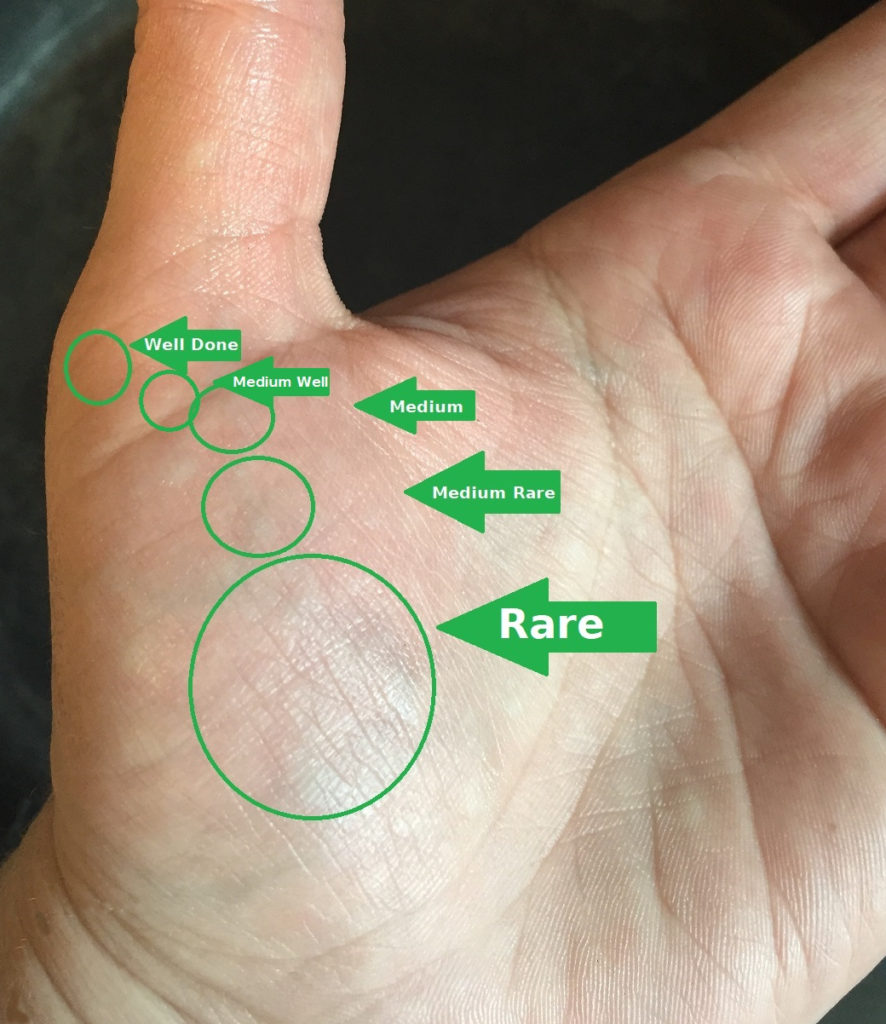
I call this the finger press test. Using your dominate hand press your finger against your non-dominate hand while it is relaxed. Press on the following areas of the hand to feel what each cook on a steak feels like. The picture below will tell you where to press. This is the best way I can show you how to tell if your steak is to your desired done-ness.
I learned this from a Gordon Ramsey cooking video a few years ago and find it’s a good way to get to know the textures of a steak’s done-ness. I think meat thermometers are great but they usually require piercing the meat and I would advise against that to keep all of the juices inside of the steak.
Cook names, temperatures and finger press test:
Rare (picture below) – ~120 F. If using a meat thermometer. If you relax your hand and feel the fleshy area just below the thumb towards the center of the inside of the hand, that squishy feeling is what a rare steak will feel like.
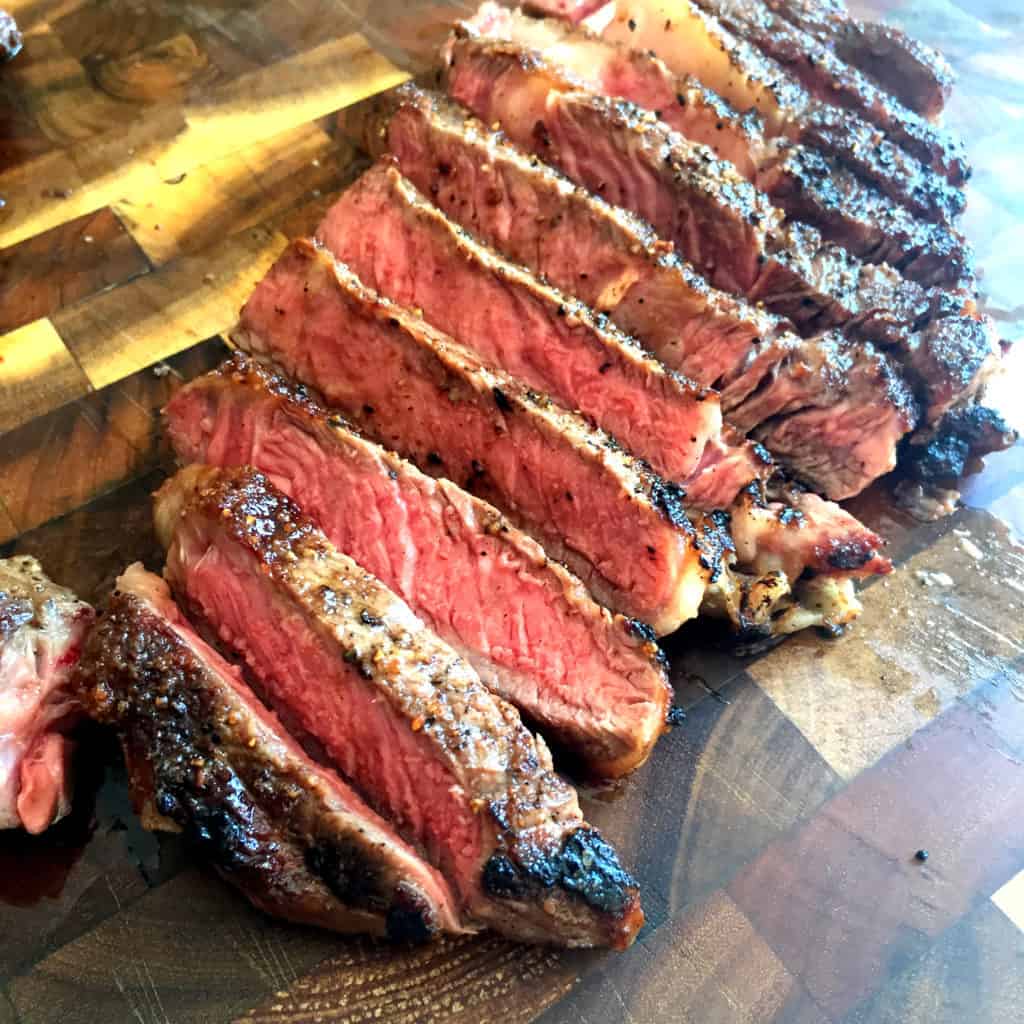
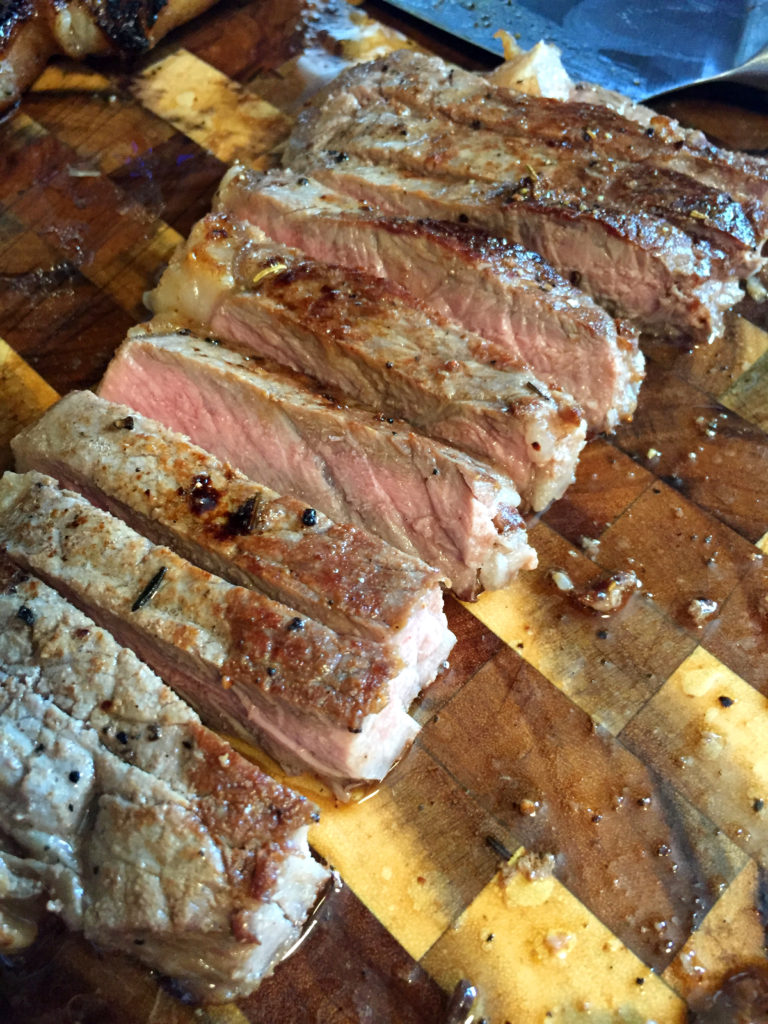
Medium Rare (picture below) – ~125 F. This feels like the area just above the fleshy part and on the inside of the hand just below the first knuckle of the thumb. It feels slightly more firm than the area just below.
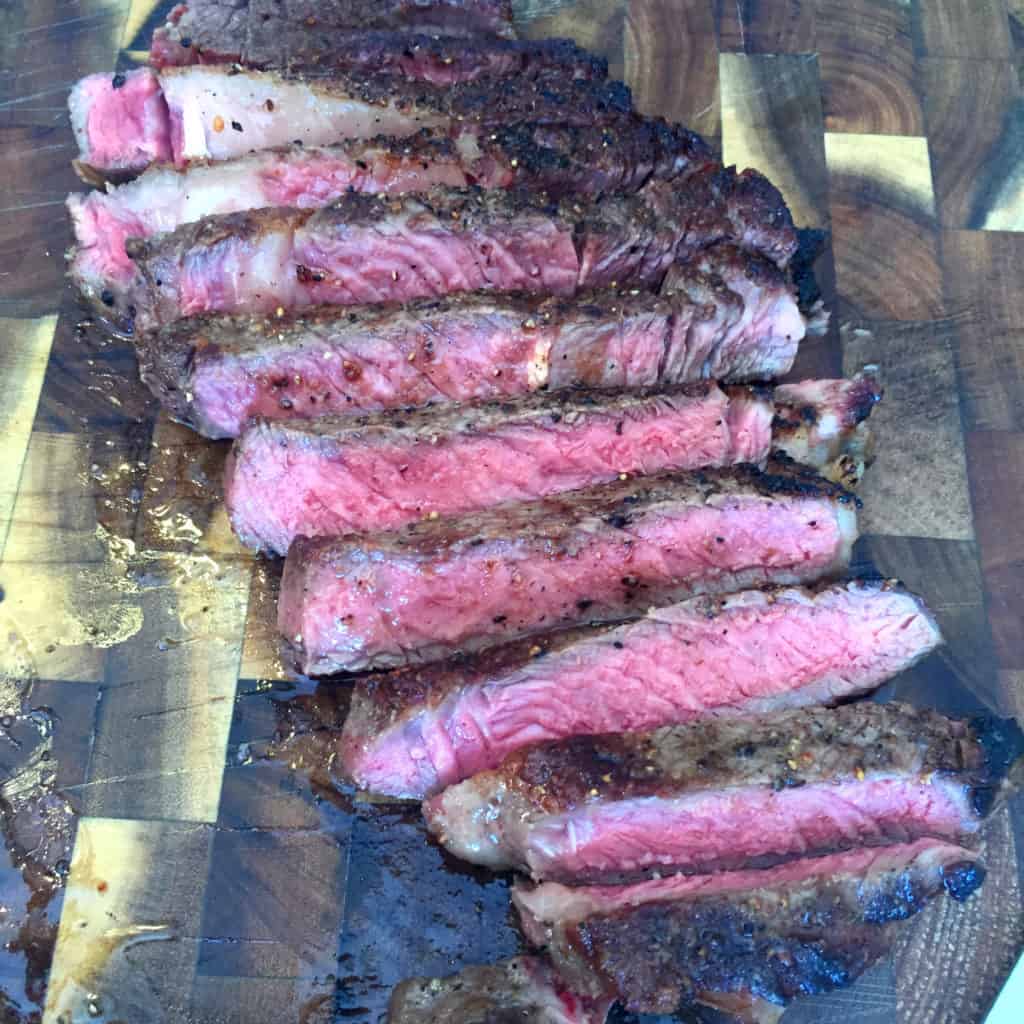
Medium (picture below) – ~135 F. Move the finger just above the area for the medium rare point and this is what medium will feel like. Just slightly firmer.
Medium well (picture below) – ~145 F. Move your finger slightly higher to towards the outside bone of the thumb but not quite to the bone. This is actually the recommended temperature by the USDA though many, myself included would consider this on the verge of being too done and overcooked.
Well done – ~160 F. This will feel like pressing on the outside of the first knuckle of the thumb. It will be very firm and I wouldn’t recommend this temperature because it will be dry, chewy and lacking in flavor.
How to cook a steak 101:
- Let steak come to room temperature. This helps the proteins relax (just like room temperature whipping cream will whip better than cold whipping cream, same with egg whites and any protein) It will result in a more tender steak.
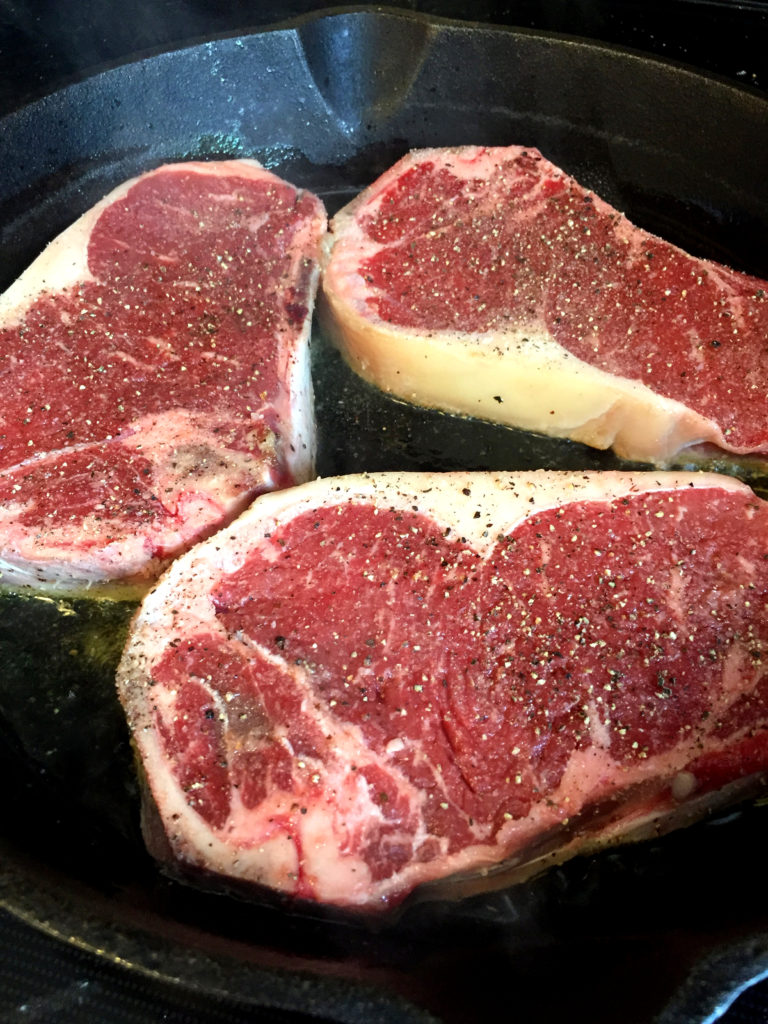
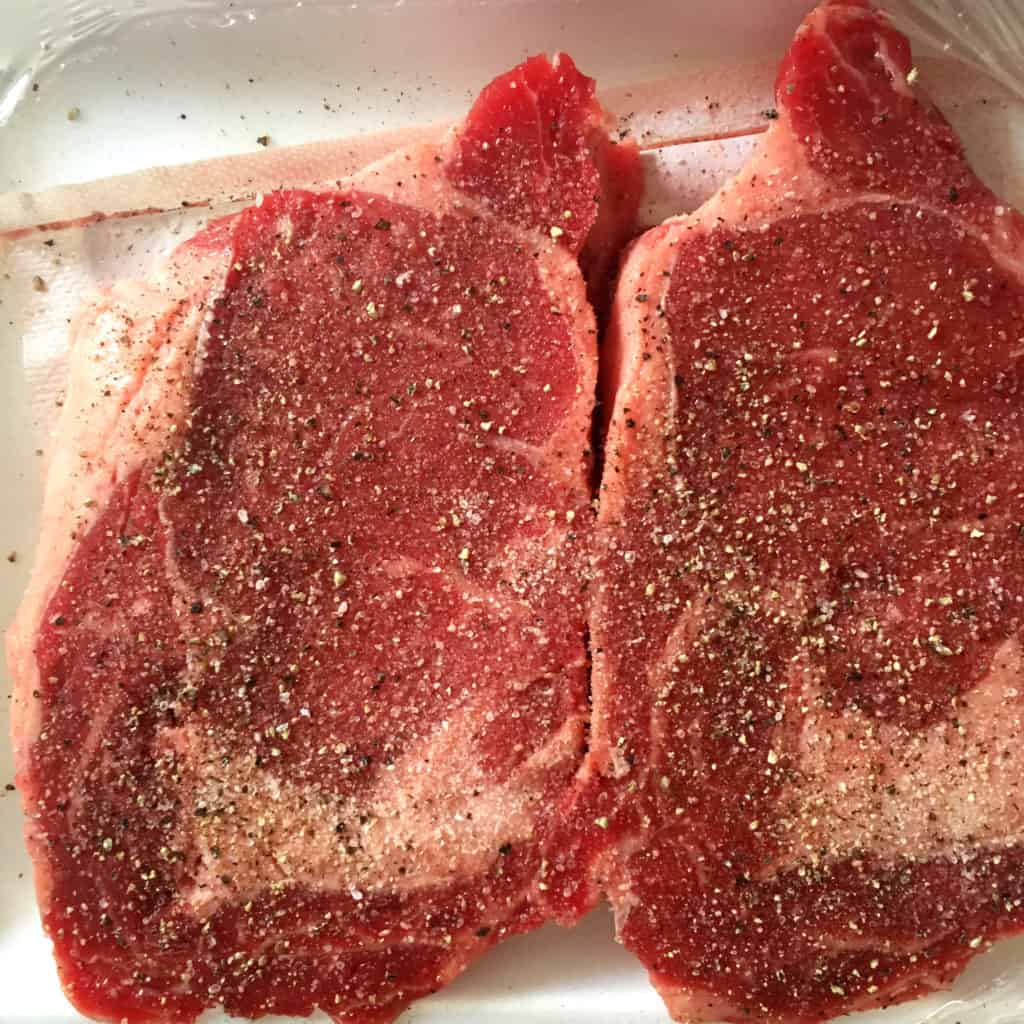
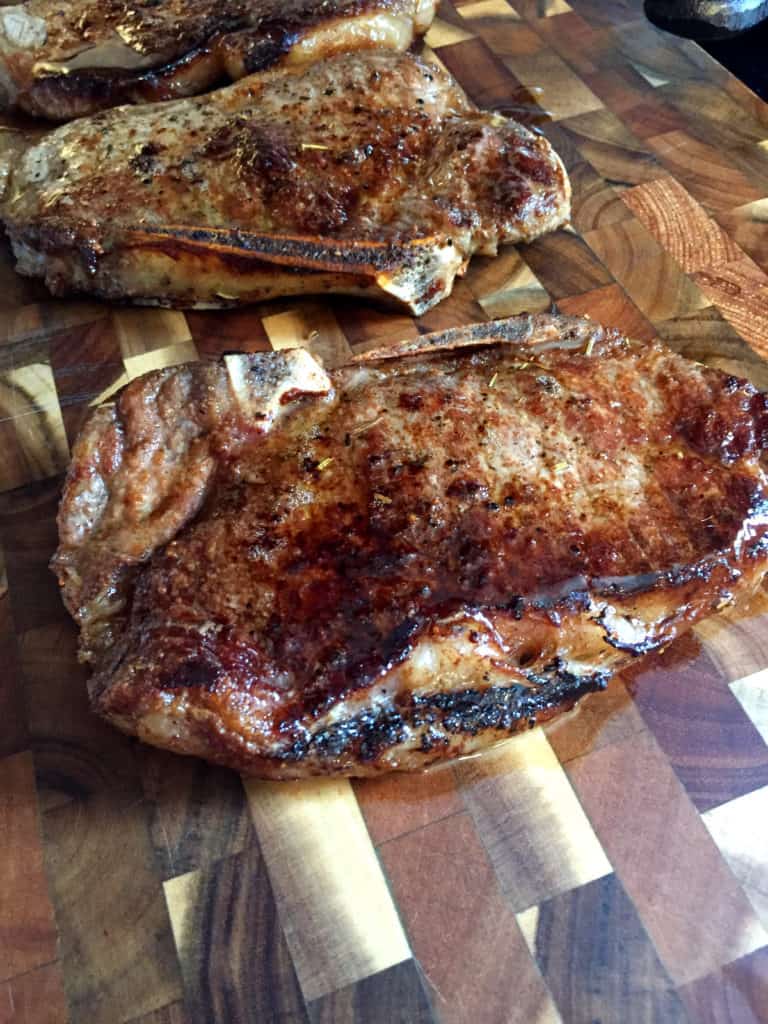
- Season your steak. I used fresh ground black pepper and pink sea salt. Any salt and pepper will do. The thicker the steak the more generous you can be with your salt and pepper. Evenly coat the meat on both sides.
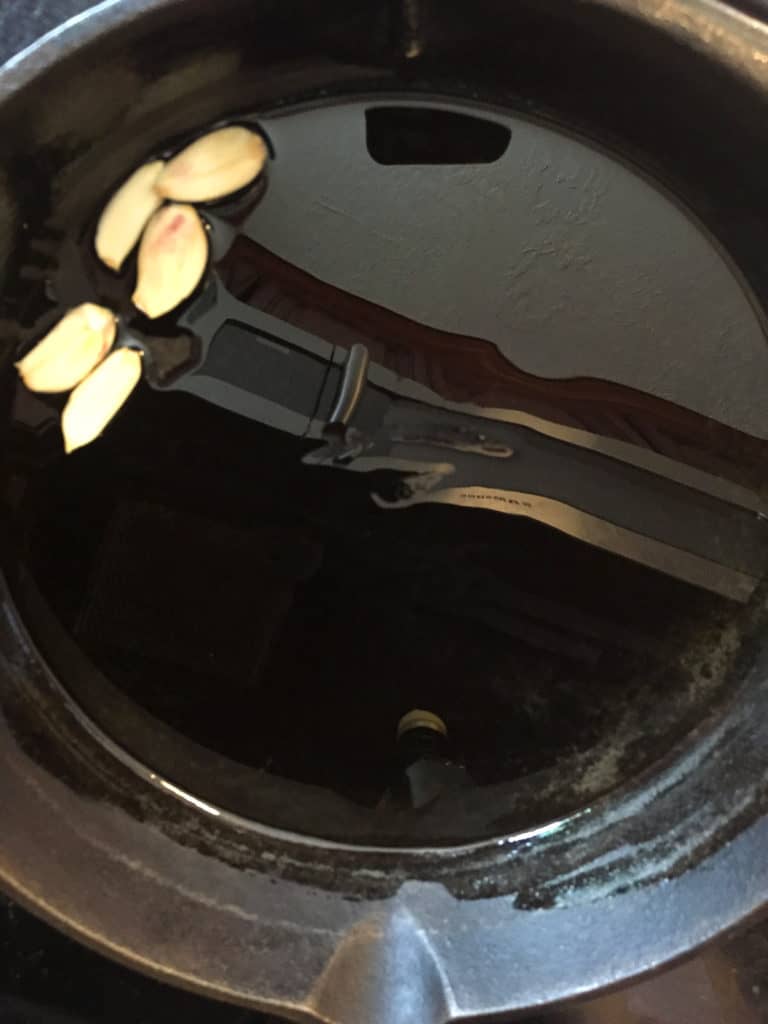
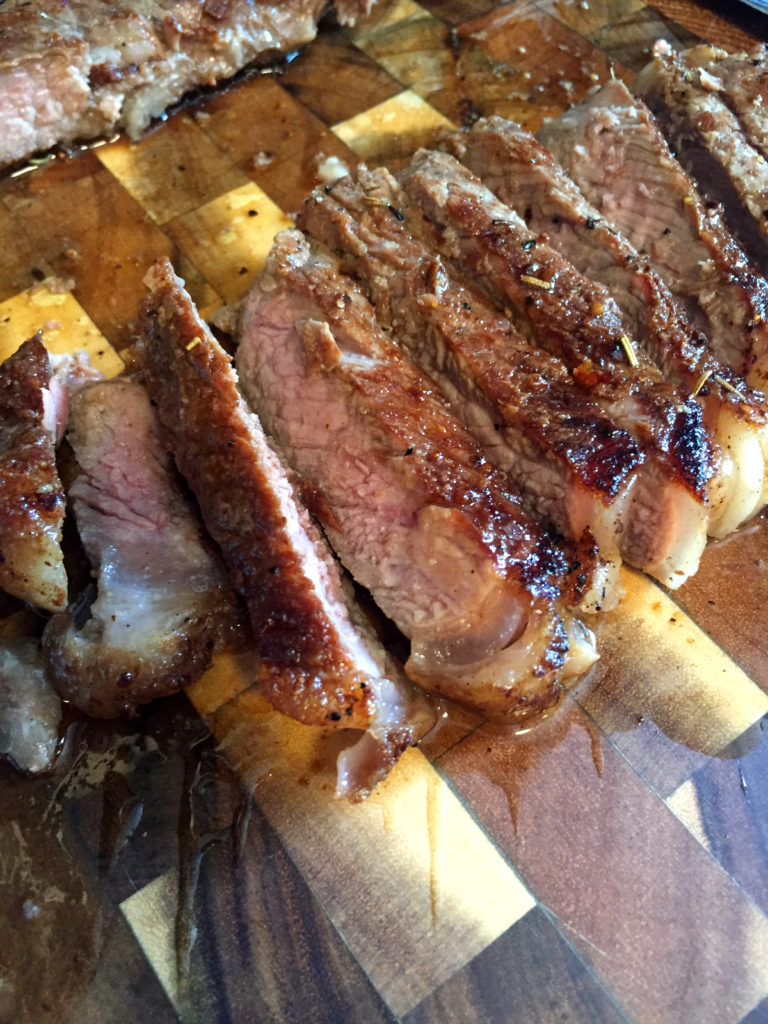
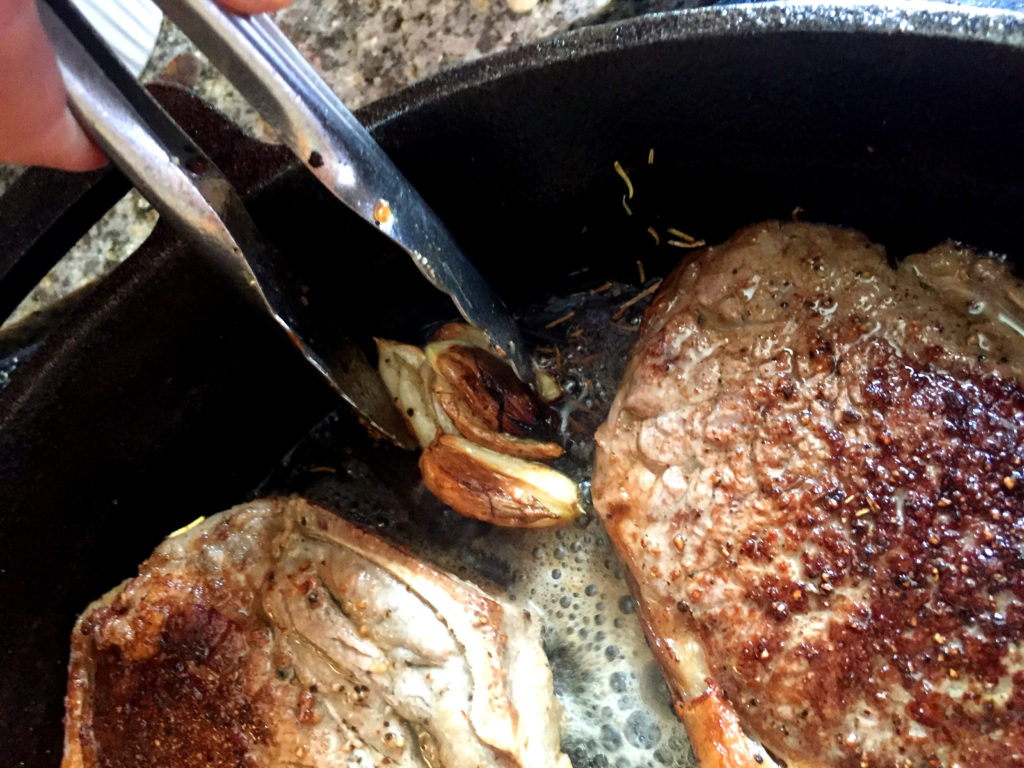
- Prepare your cast iron pan. Add enough olive oil to generously coat the bottom of the pan. Add fresh garlic cloves and rosemary to the side of the pan. This is optional. Adding them will flavor the oil subtly with garlic and rosemary. We will remove them during the cooking process. Turn heat on high.
- When to add the steak to the pan. When olive oil shows the very first sign of smoking, like a tiny little whisp of smoke coming off of the pan, add the steak and make sure it have a good connection with the pan on all points of the steak. A steak with a bone will naturally pull away from the pan on areas next to the bone.
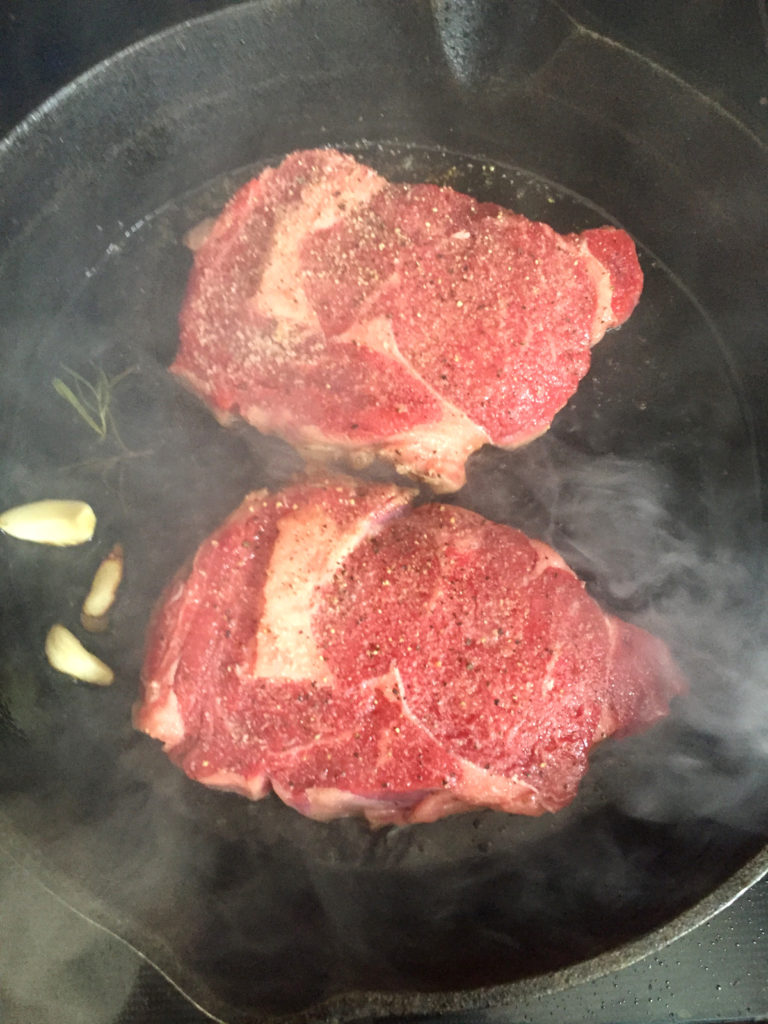
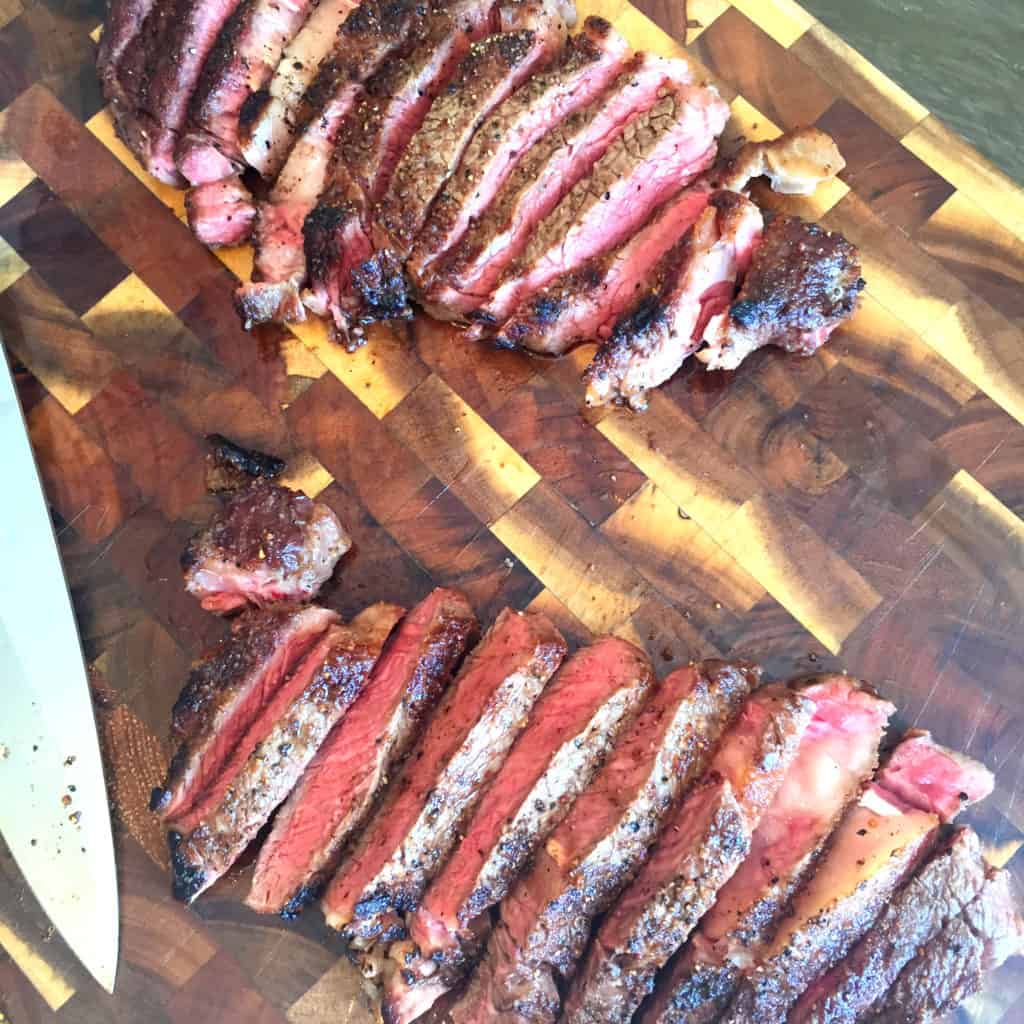
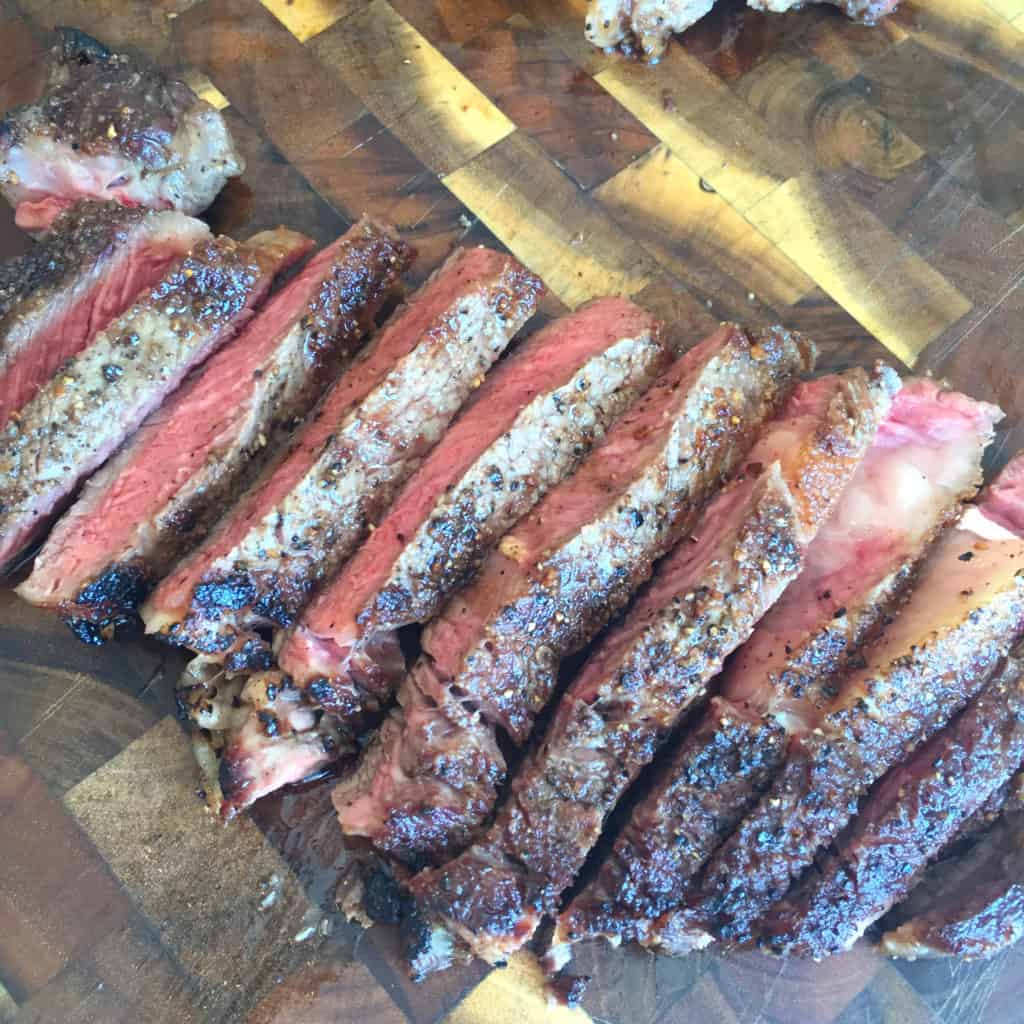
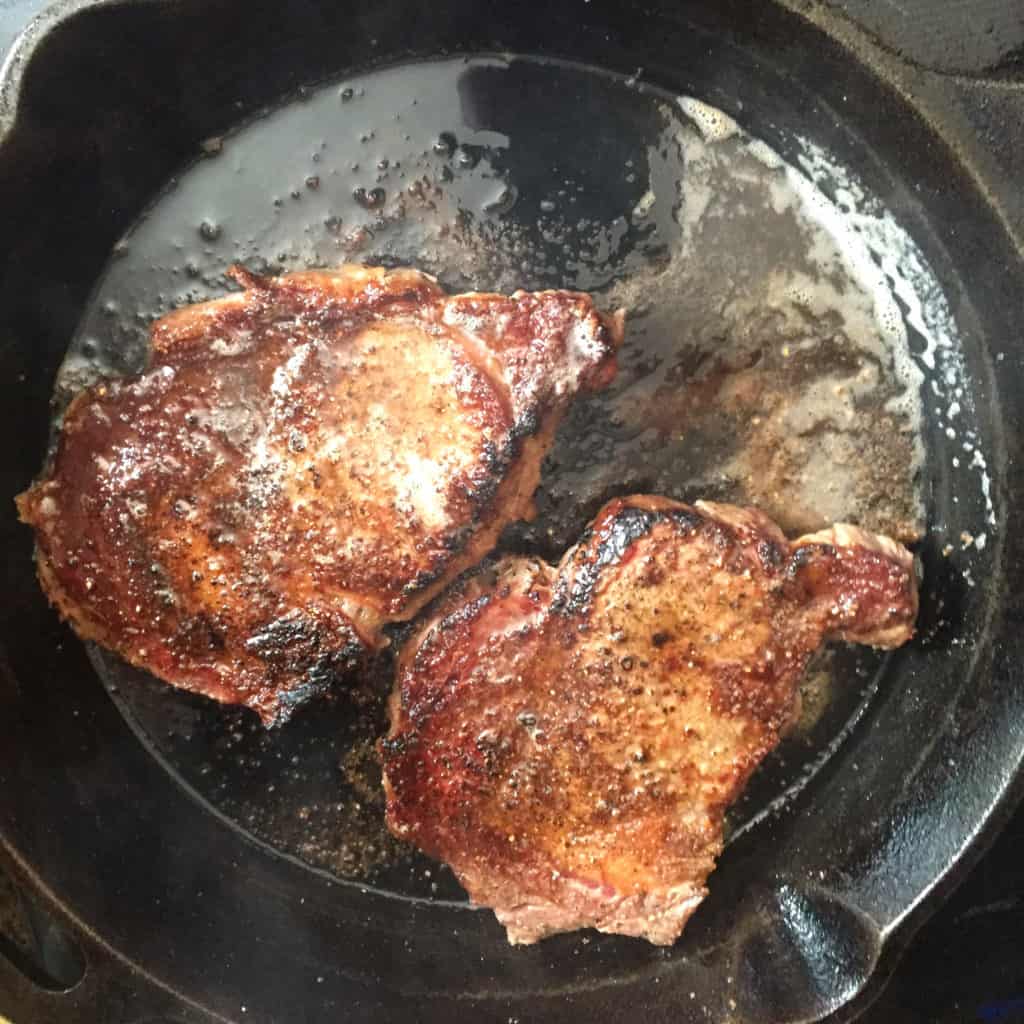
- Searing your steak. Let the steak cook for 2-3 minutes on the first side, don’t move it. The less movement on a steak means more juices are left in the steak when you finish.
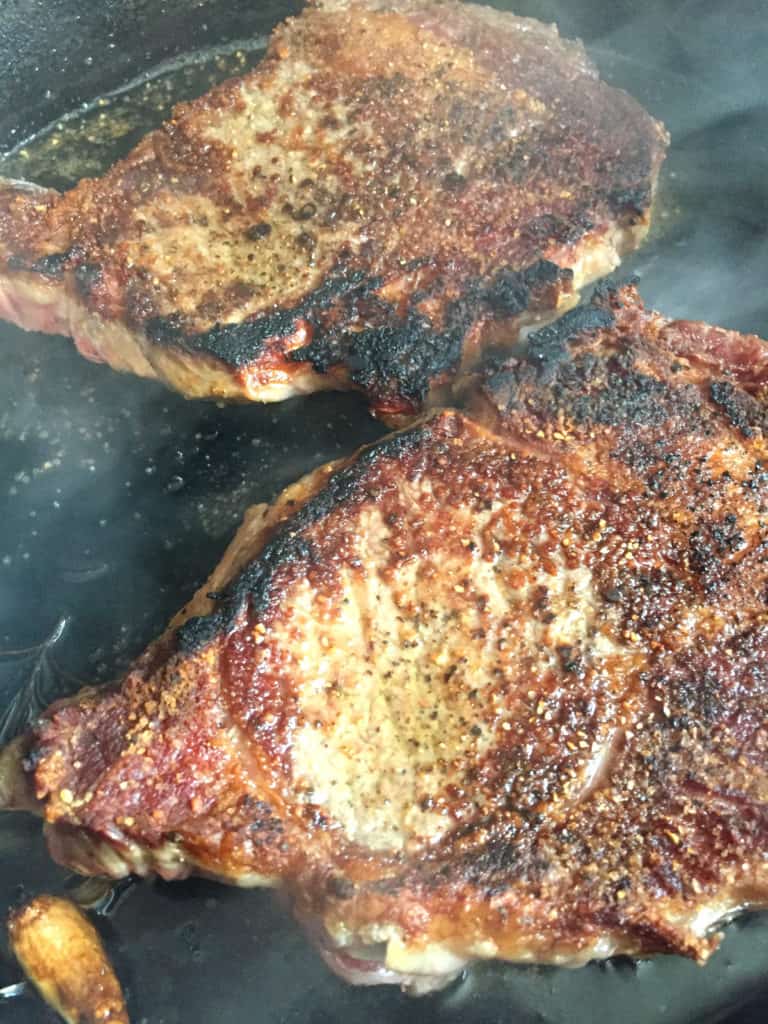
- Flip your steak. Using tongs or a spatula, flip the steak over and continue cooking. After 2-3 minutes you can adjust the heat to a lower setting. This will lower the amount of smoking from the oil.
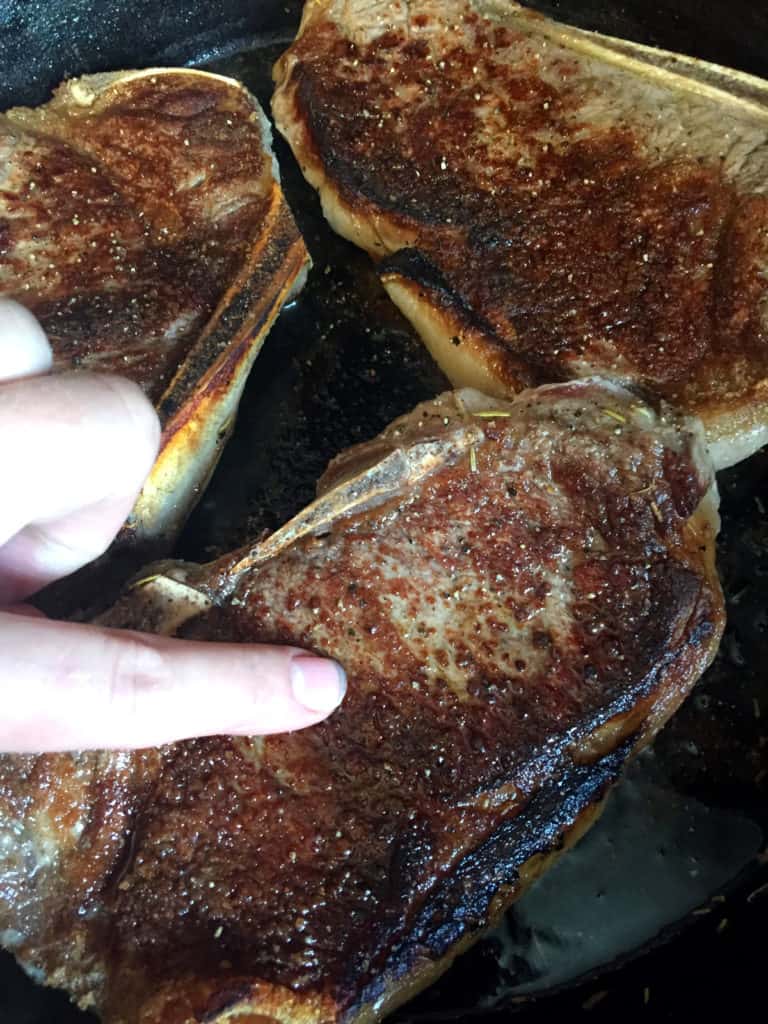
- When is the steak done? The thickness of your steak will have an influence on the time you spend cooking it. So use the finger press test I told you about above to check the done-ness at this point, I prefer this test over a thermometer because any piercing of the meat will let some of the juices out.
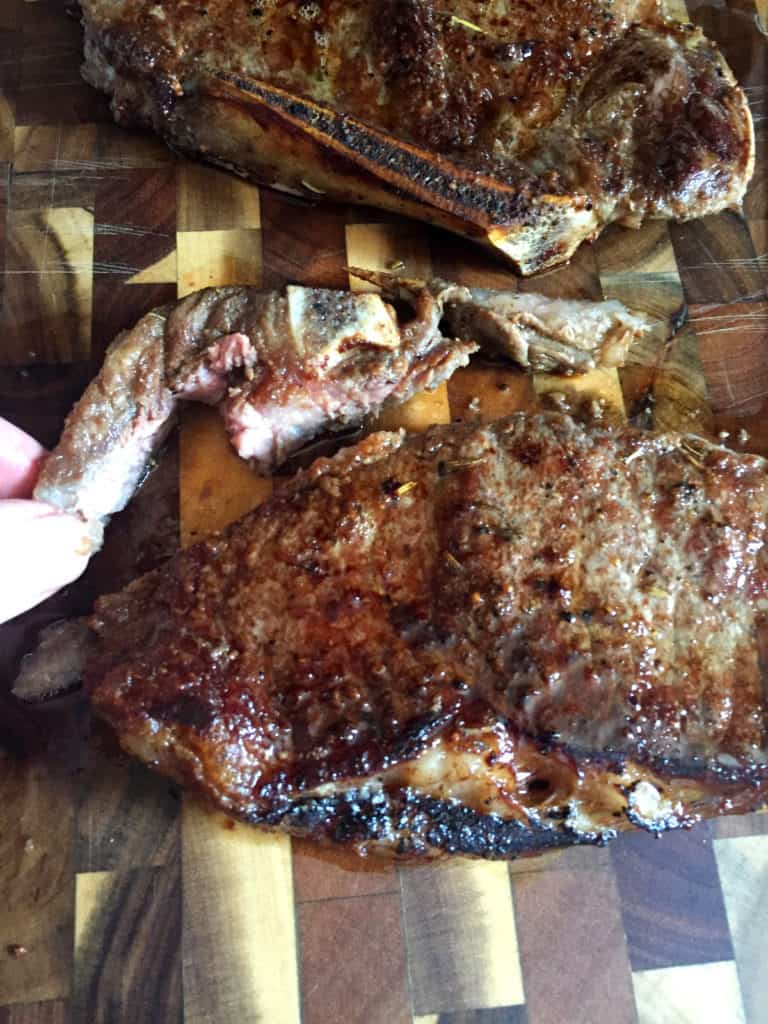
- Remove the garlic and rosemary. If your garlic and rosemary are starting to burn, remove them with tongs at this point.
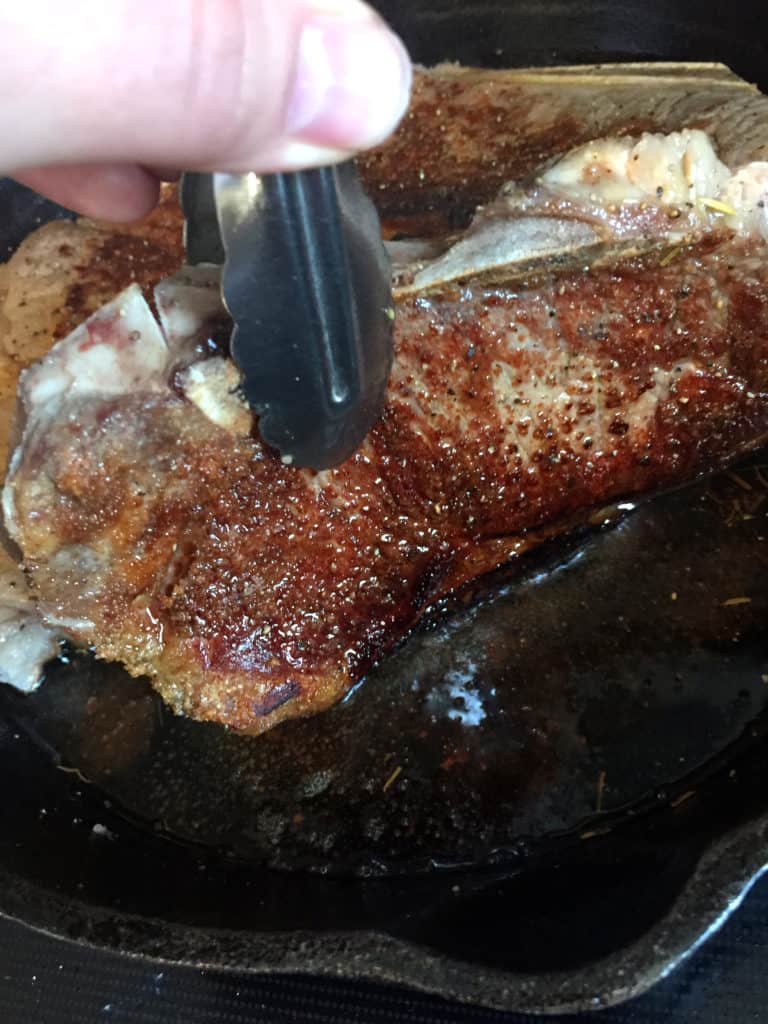
- Sear the sides of the steak. Use tongs to sear the sides of the steak.
- Need more cook but don’t want the steaks outsides to burn? This can happen when working with a really thick cut. Add to an oven heated to 425 F. and continue cooking for a few minutes or until internal temperature or finger press test result in desired temperature.
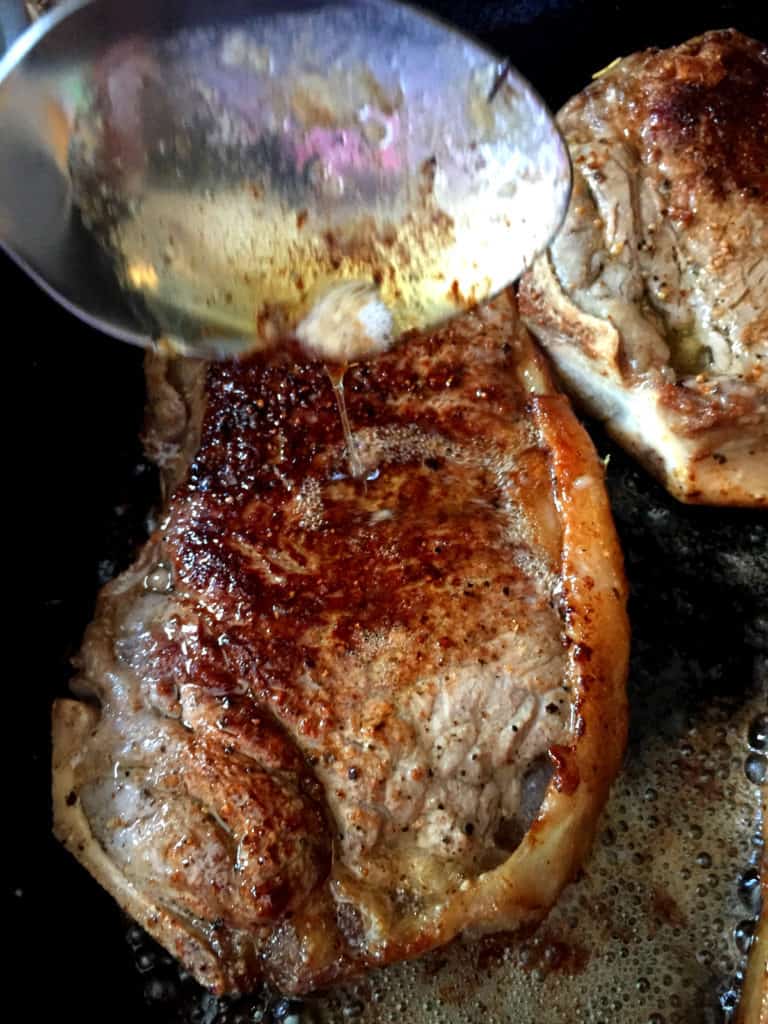
- Add butter. When the steak is at your desired cook, Add about 1 tablespoon of butter to pan.
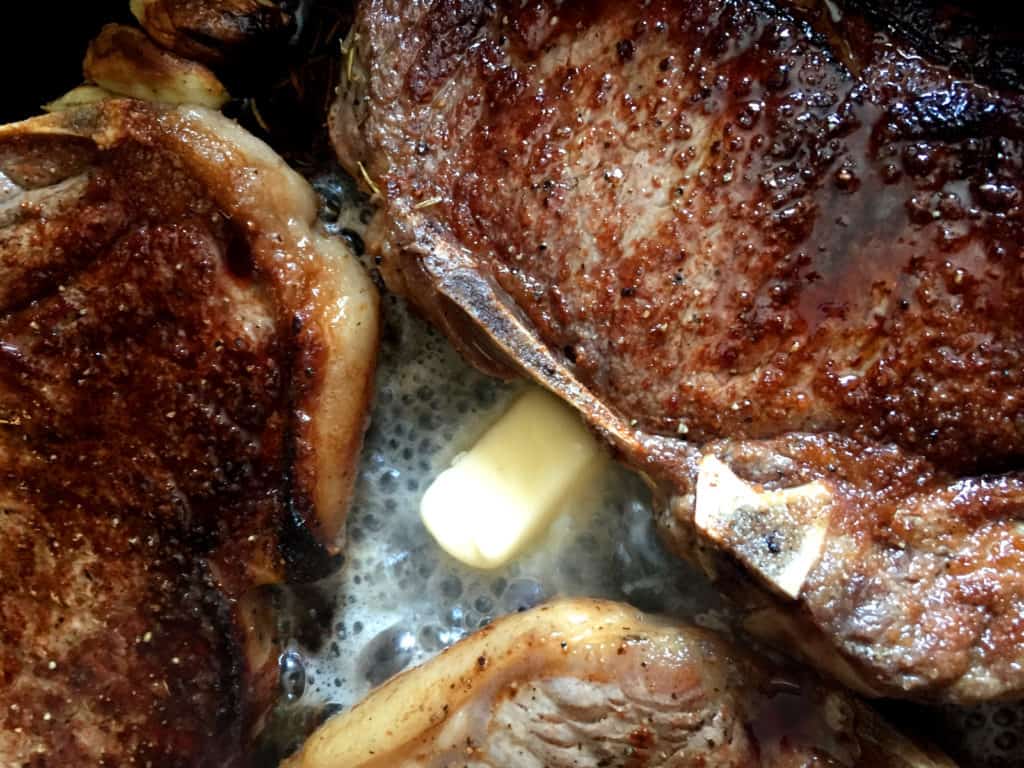
- Spoon on the flavor. Once butter is melted, tilt pan and spoon butter over the top of steak.
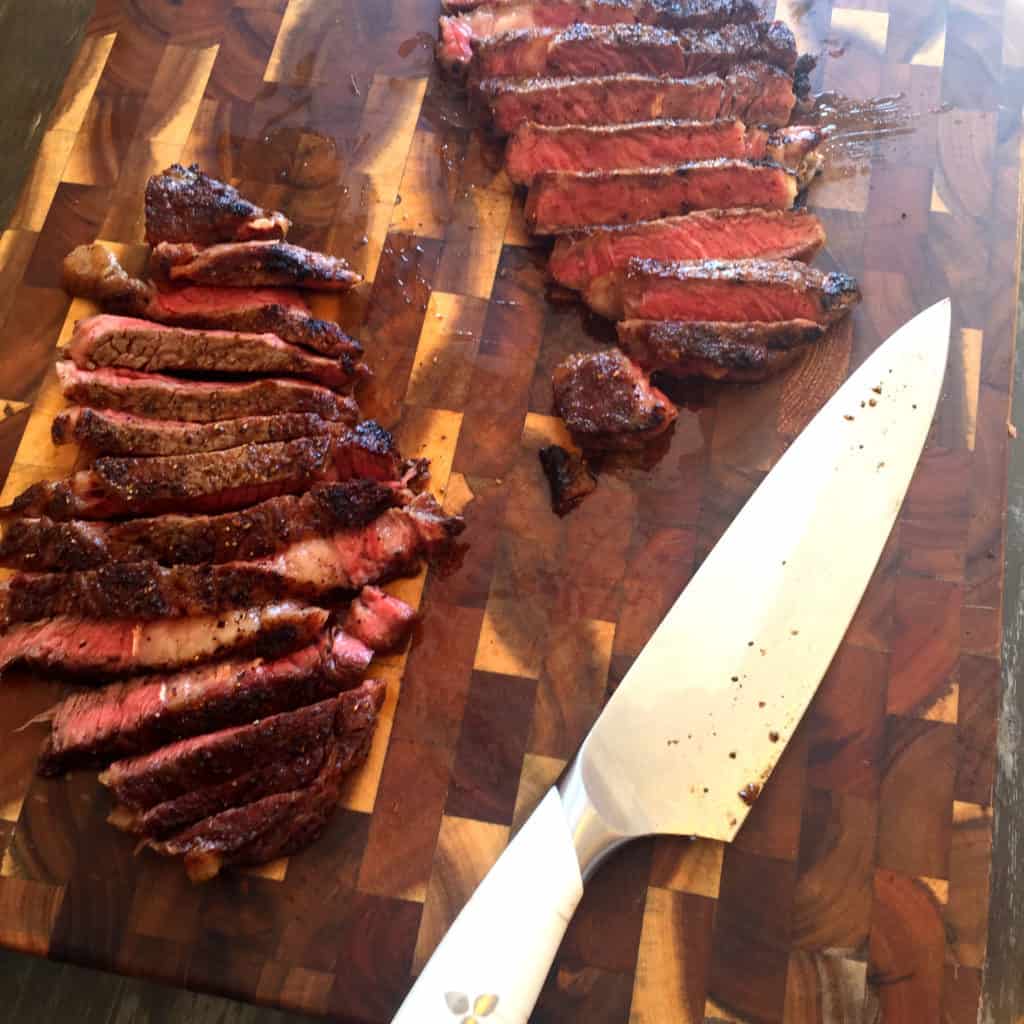
- Let it rest. Remove from pan and allow to rest for at least 5 minutes, This will allow the juices to recirculate through out the steak, resulting in a juicer and more tender piece of meat.
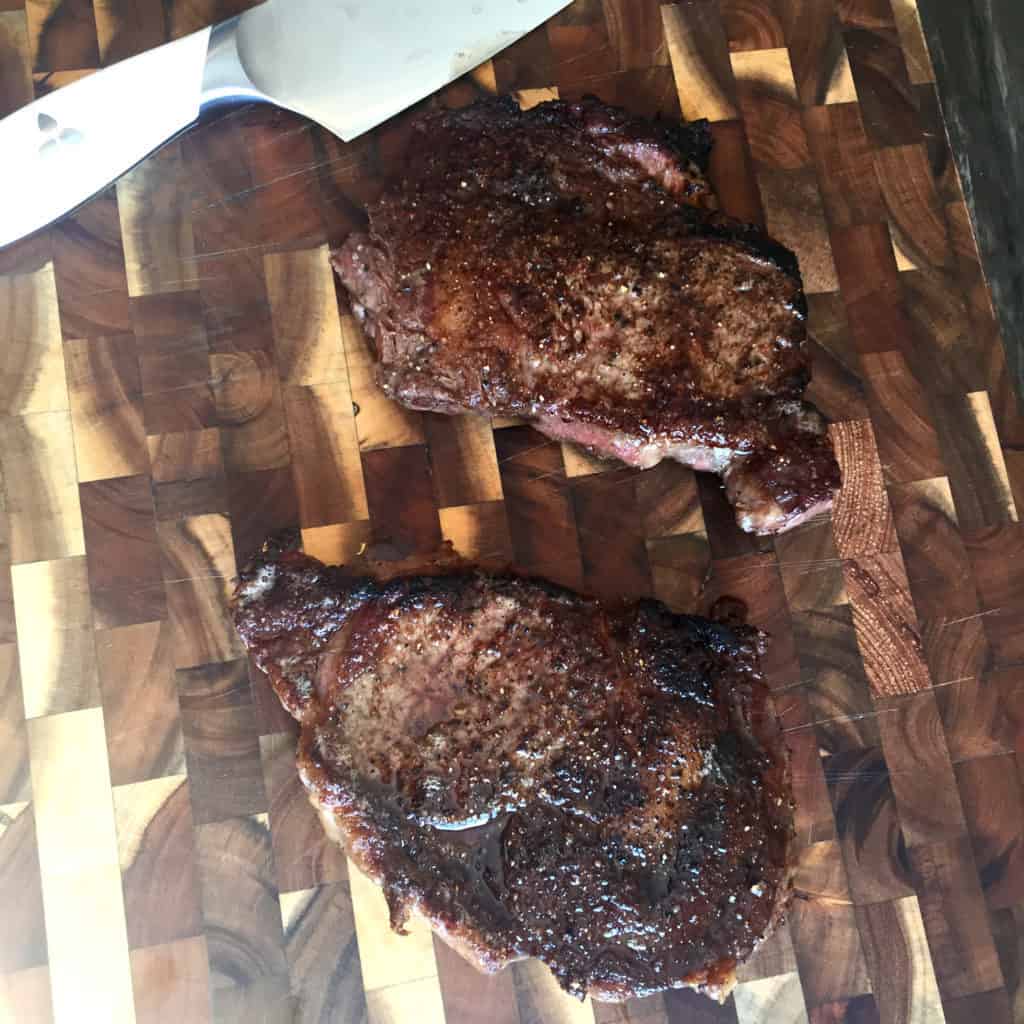
- Remove any bones. If you need to remove a bone, after the steak has rested, use a sharp knife to cut along the bone line before slicing a serving.
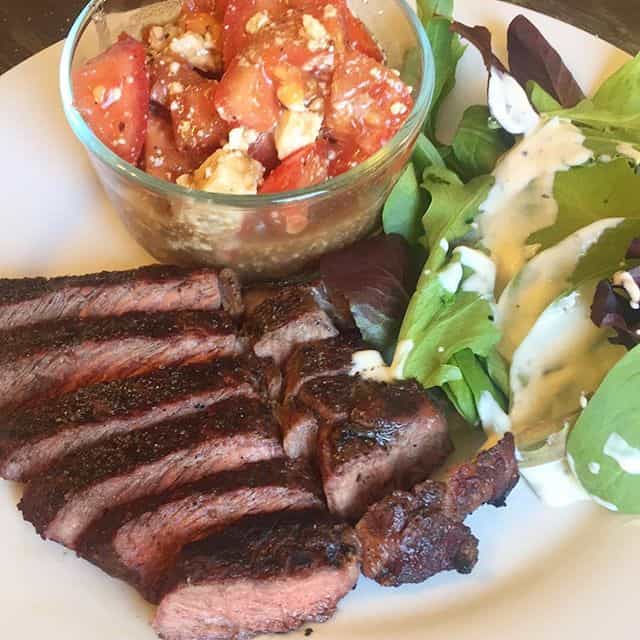
- Go against the grain. When slicing the steak always cut against the grain so the meat is easier to chew.
Enjoy! Learn from each time you cook a steak and you will be a master in no time!