This homemade toffee is buttery, sweet, perfectly crunchy and utterly delicious! This recipe reminds me of my grandma, she would make this every year during the holidays and I remember making it with cousins when I was a girl too. It’s completely nostalgic and totally yummy!
There are a few tricks to getting your toffee to the perfect state where it snaps and will crunch when you bite into it and I will go over those steps in this post. This toffee can be coated in chocolate or left plain. I personally love chocolate and sea salt sprinkled over the tops.
As with any of my candy recipes you will need to know the candy stages and how to do the ice water test. You can actually make this without a candy thermometer but they are nice to have. However, I have learned that they aren’t always as accurate as you may think so I always do the ice water test as well.
Here are the candy stages for syrups, caramels, taffy’s and toffee, etc.
- Thread stage – This will fall apart in your hand and feels like a syrup or sauce. This stage is reached around 230 F- 234 F.
- Soft ball stage – Where it will form a soft ball but that ball will promptly fall flat in your hand. this stage will be reached at 234 F. – 241 F.
- *Caramel stage –238 F. is the perfect caramel stage – the ball will hold it’s shape but will flatten very slightly or wilt after a few seconds of holding it, you can also go fully to hard ball stage for a little more toothsome caramel. Typically 238 F.- 243ish F. is perfect.
- Hard ball stage – Where the ball formed in your hand stays in the shape of a ball but is still soft and pliable. 250 F. to 256 F.
- Soft crack stage – Means it will be hard on the outside and tough to work with your hands, this is the stage you would use for taffy, where you would pull the sugar until it softens. 270 F. – 289 F.
- Hard crack stage – When the candy is hard and snaps easily. This is used for peanut brittle, toffee, candy canes and hard candies.295 F. – 309 F.
The ice water test:
The ice water test is what you will use to make sure your toffee is at the perfect stage you want it to be at. This is a fool proof way of seeing what your candy will turn into when it cools, thermometers are great for giving an idea but they can be off by a few degrees sometimes so I always suggest doing this test too.
How you do the ice water test:
You will grab a glass and fill it with ice and cold water. Set it next to your stove as you make this toffee. When you get to the hard crack stage or you are curious where your sugar mixture is at; spoon a little of the hot mixture and pour it into the ice water. Reach in with your hands and feel the toffee to see how it will snap when it cools.
If it falls through your hands you are at the thread stage, if it forms a soft ball that falls flat in your hand you are at soft ball stage. If it forms a firmer ball and keeps it’s shape you are at hard ball stage. If the caramel forms a firm ball and is a little tough, it’s at soft crack stage. If it snaps then it is at hard crack stage, where you want it for toffee.
How do I get that snap?
The ice water test is going to be the most accurate way to check and see the snap from your homemade toffee. I also always taste test the ice water test piece of toffee because I don’t want it to soften in my mouth because then it will be harder to eat and stick more to your teeth. So it has to crunch when I bite with my teeth.
What I suggest to get a good snap is get the toffee to that crisp toffee state then remove the pan from the heat but still stir it for another 3 minutes in the hot pot, this will make sure all liquid is cooked out and you’ll have a good snap. The exception to this is if your toffee is on the brink of burning, if it suddenly turns dark brown then you need to get it out of the pot as soon as possible to save it. If that’s the case then pour onto a parchment paper lined cookie sheet immediately, you can also add a little more cream to the mixture quickly to avoid it burning, that is kind of a hail Mary at that point but I have saved nearly burnt toffees and caramels that way before.
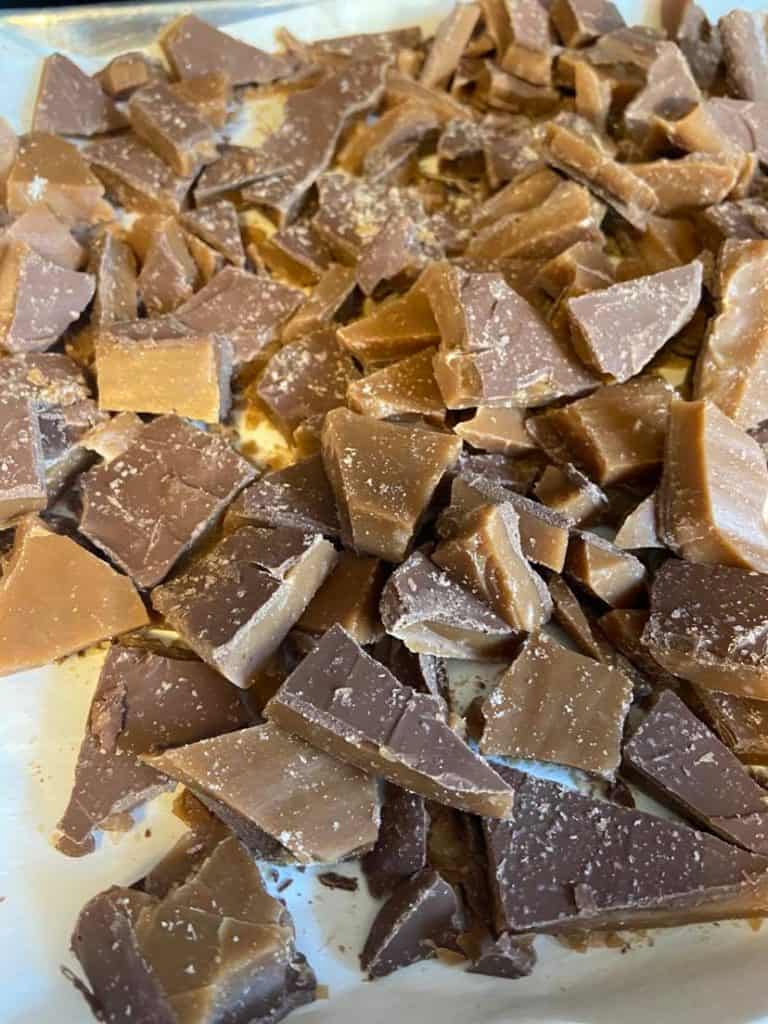
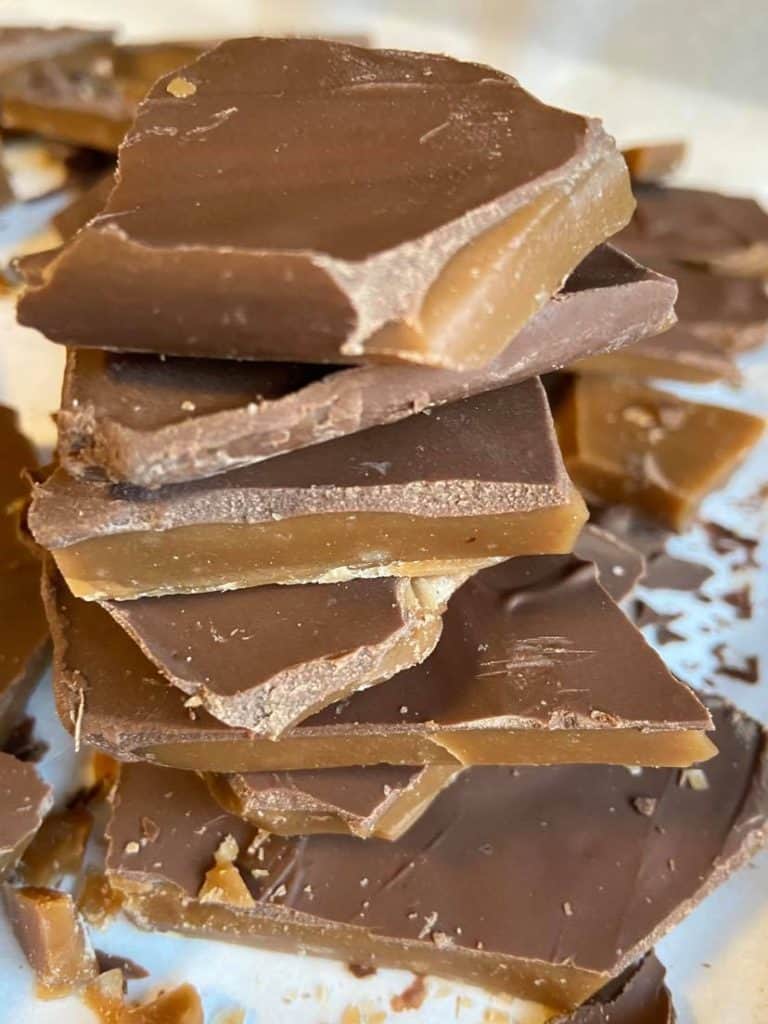
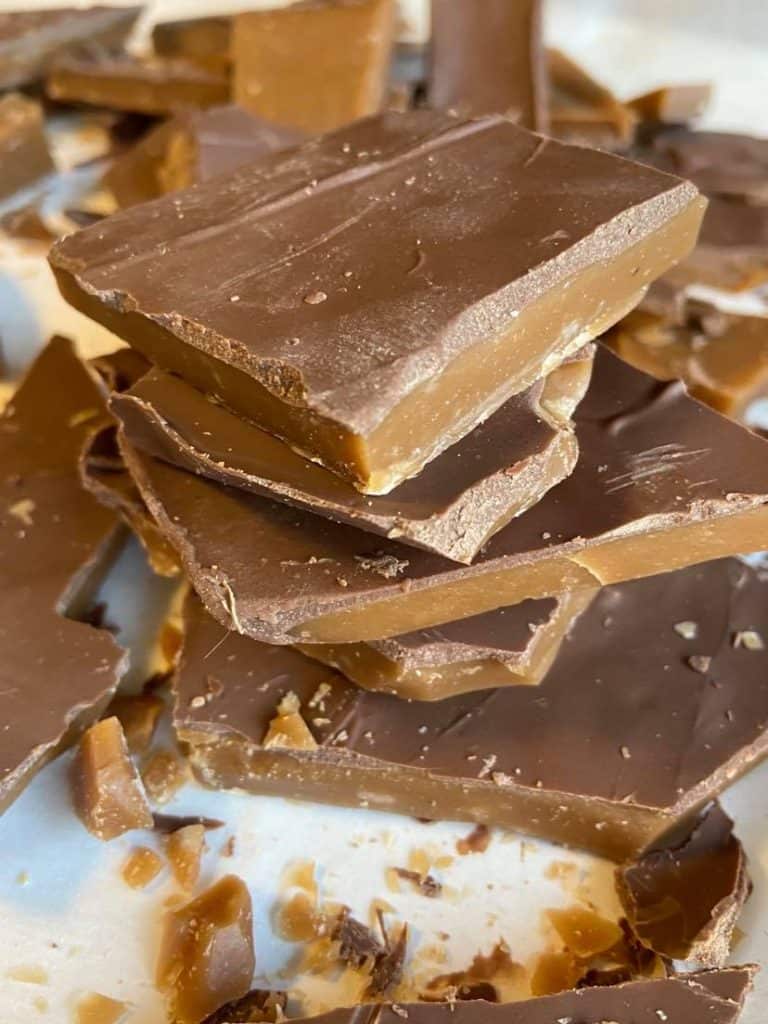
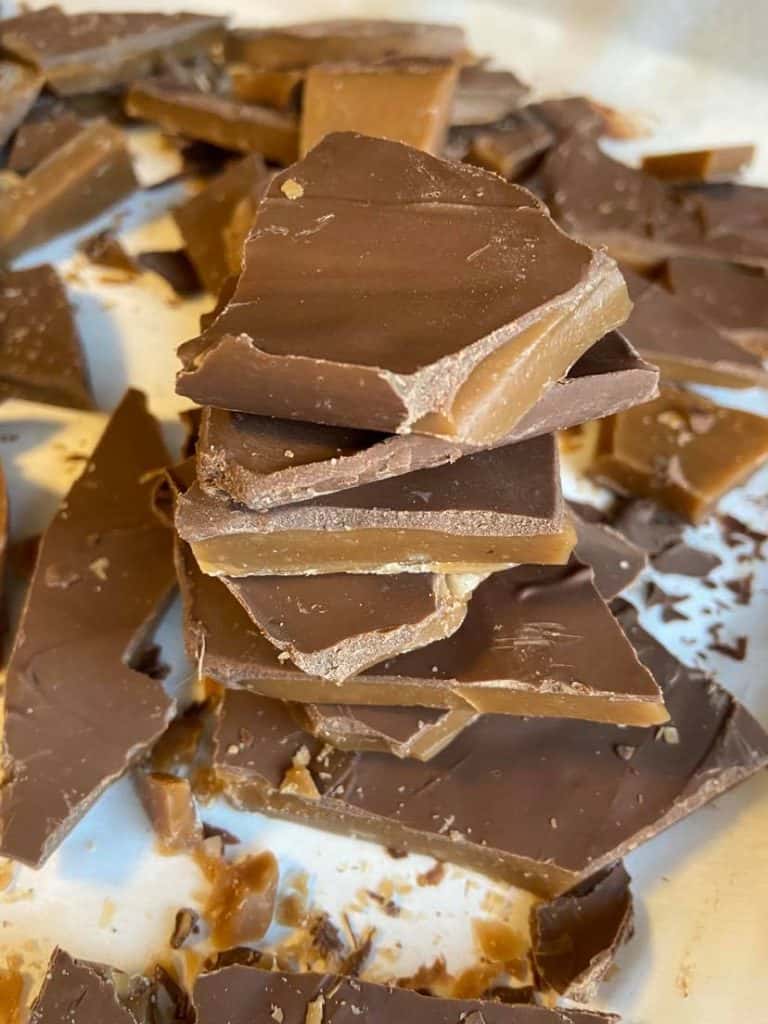
Another way to insure a nice snap to your homemade toffee is to pour the toffee thinner, if you want a really crispy toffee then pour this batch onto 2 parchment paper lined cookie sheets, if you want it thicker than pour it onto 1 parchment paper lined cookie sheet, these pictures are the result of pouring onto 1 cookie sheet.
What you need to make homemade toffee:
makes roughly 1 – 9 x 13 cookie sheet full or 2 cookie sheets of thin toffee
- 1 cup salted butter
- 4 cups sugar
- 1/3 cup corn syrup
- 1 1/2 teaspoons salt
- 1 cup cream
- 12 ounces chocolate chips of choice – optional
- sea salt – optional
- crushed nuts, m&m’s or desired toppings- optional
Instructions for homemade toffee
- Prepare a cookie sheet with parchment paper and set aside. (if you want a thin toffee then prepare 2 cookie sheets).
- In a large heavy bottomed pan, (the heavy bottom helps regulate heat better and prevents scorching more), add butter, sugar, corn syrup and salt and begin cooking until sugar begins to dissolve and the mixture becomes liquidy.
- Slowly pour in your cream while stirring at this point.
- Bring mixture to a boil and cook until it reaches hard crack stage with your ice water test (see instructions above) or about 305 F. with a candy thermometer, remove from heat and continue stirring hot mixture in the pot for about 2-3 minutes, the mixture will stop boiling during this time.
- Pour mixture onto your lined cookie sheets and smooth out with a rubber spatula. You can bang the pan against the counter top to help any bubbles some to the surface then press them out with the rubber spatula.
- The toffee will begin setting up immediately, once it has a semi-hard film across the top, sprinkle on your chocolate chips if using them and let them melt.
- Once they are melted, use a rubber spatula to smooth the chocolate over the tops.
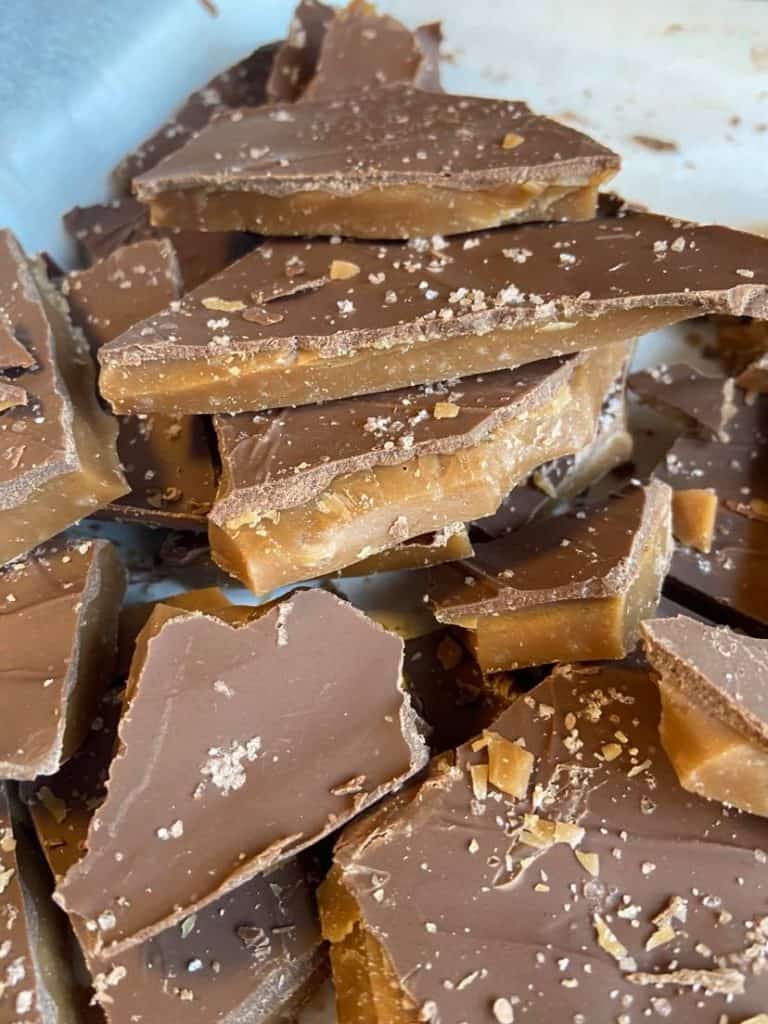
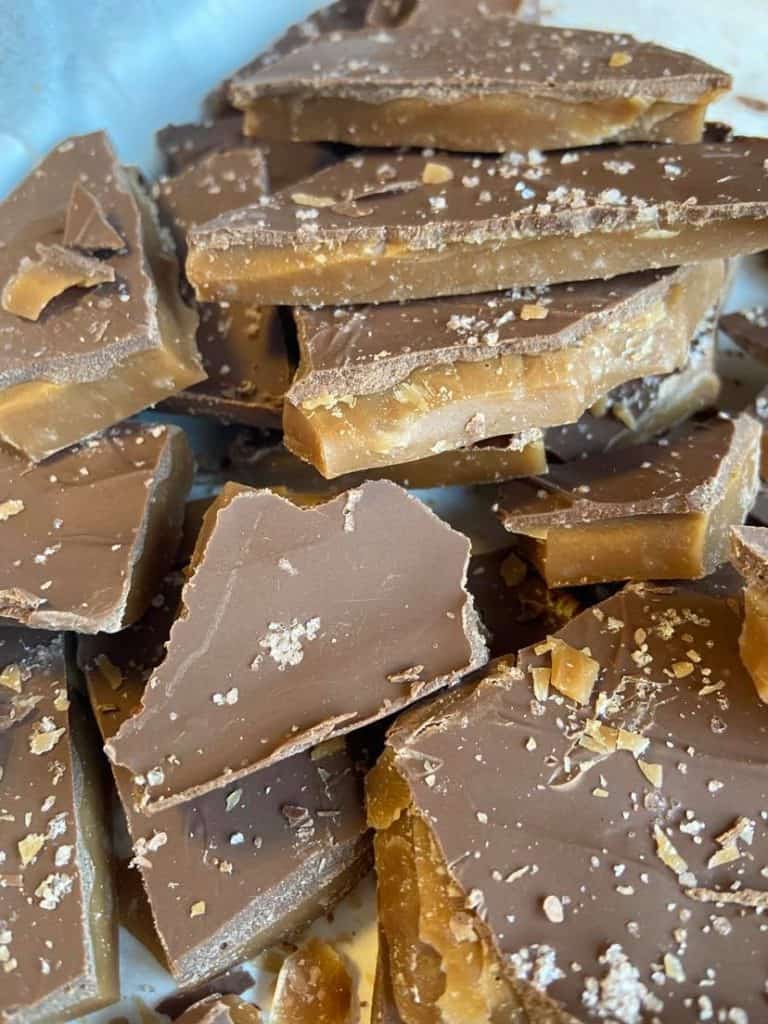
- Optional – Add m&m’s, crushed nuts, sea salt or whatever you want on top and let the chocolate and toffee cool completely.
- When cooled, lift up toffee block and begin cracking into desired sizes. I sometimes use a rolling pin to break up into smaller pieces but usually you can just lift and drop on a counter top to break.
- Toffee will last on the countertop for a long long time, I’ve never actually had it go bad because it gets eaten.
- Enjoy!
Printable instructions are below.
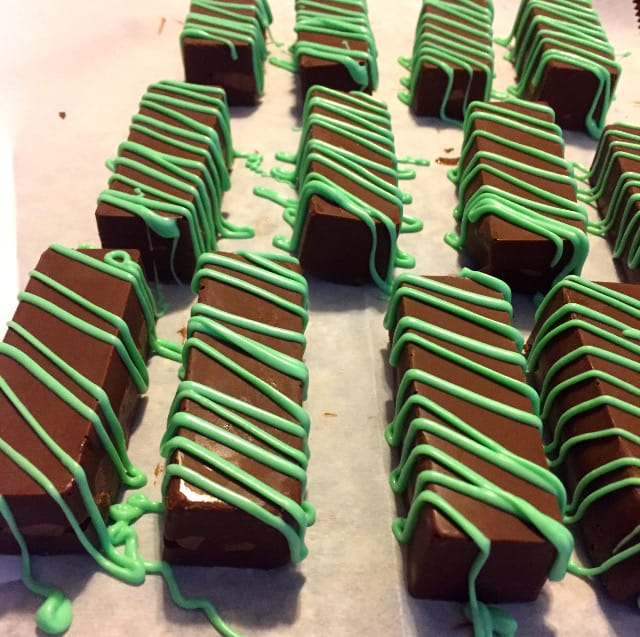
Here are a few other candy recipes you may love: click on the picture for the recipe.

Homemade Toffee
Equipment
- cookie sheet
- parchment paper
- heavy bottomed pot
- rubber spatula
- ice water
- candy thermometer – optional
Ingredients
- 1 cup salted butter
- 4 cups sugar
- 1/3 cup corn syrup
- 1 1/2 teaspoons salt
- 1 cup cream
- 12 ounces chocolate chips of choice – optional
- sea salt – optional
- crushed nuts m&m’s or desired toppings- optional
Instructions
- Prepare a cookie sheet with parchment paper and set aside. (if you want a thin toffee then prepare 2 cookie sheets).
- In a large heavy bottomed pan, (the heavy bottom helps regulate heat better and prevents scorching more), add butter, sugar, corn syrup and salt and begin cooking until sugar begins to dissolve and the mixture becomes liquidy.
- Slowly pour in your cream while stirring at this point.
- Bring mixture to a boil and cook until it reaches hard crack stage with your ice water test (see instructions above) or about 305 F. with a candy thermometer, remove from heat and continue stirring hot mixture in the pot for about 2-3 minutes, the mixture will stop boiling during this time.
- Pour mixture onto your lined cookie sheets and smooth out with a rubber spatula. You can bang the pan against the counter top to help any bubbles some to the surface then press them out with the rubber spatula.
- The toffee will begin setting up immediately, once it has a semi-hard film across the top, sprinkle on your chocolate chips if using them and let them melt.
- Once they are melted, use a rubber spatula to smooth the chocolate over the tops.
- Optional – Add m&m’s, crushed nuts, sea salt or whatever you want on top and let the chocolate and toffee cool completely.
- When cooled, lift up toffee block and begin cracking into desired sizes. I sometimes use a rolling pin to break up into smaller pieces but usually you can just lift and drop on a counter top to break.
- Toffee will last on the countertop for a long long time, I’ve never actually had it go bad because it gets eaten.
- Enjoy!